레이블이 Primitive Technology인 게시물을 표시합니다. 모든 게시물 표시

Primitive Technology: Barrel Tiled Shed 원시 기술 : 배럴 기와 창고

Primitive Technology: Barrel Tiled Shed


I built a tiled roof shed to provide a fire and rain proof shelter for working on projects during wet weather and for storing firewood. The shed houses the very kiln used to fire its own tiles. 
I cut timber using the stone hatchet and took it to the building site. 6 Upright posts were stuck into the ground about half a meter. Mortices were cut into the horizontal beams using a stone chisel to start with, then had there mortices enlarged using hot coals and a blow pipe to burn them out more. These beams were put in place and rafters were lashed on with lawyer cane. The wood that the tiles sit on are about 50 cm apart. The finished frame was 2 x 2 m in floor plan, 2 m tall at the ridge line and 1.5 m tall at the sides. This roof angle is about 22.5 degrees, half the pitch of the huts I usually make. This took about a week but I did it about 4 months ago and left the wood at the site because I was busy on other videos
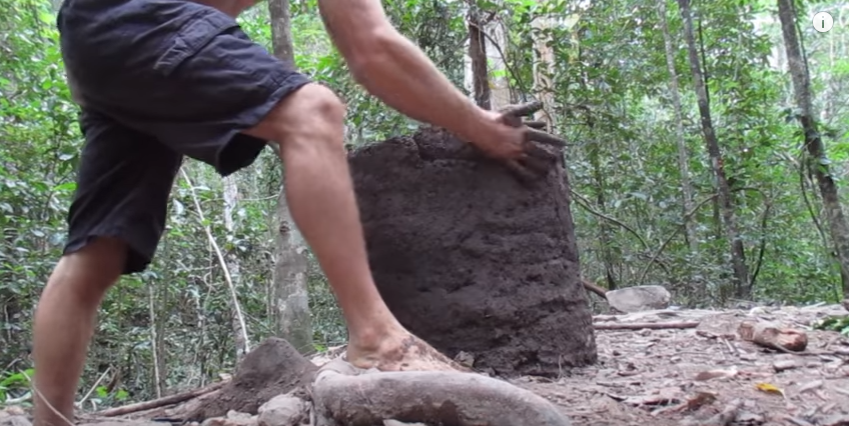
Next I made a kiln. I made a basket to make it easier to carry clay from the creek. I dug a trench for the firebox of the kiln and made a clay vault over it using stick arches to support it. Holes were put into the vault to let flames through. The kiln shape was a cube with a domed roof. It was made of mud on site (clay from the creek is too good to build a kiln with and is best used for pottery). Grate bars were put into the firebox to increase wood burning efficiency by letting air come up through the wood rather than over it. This only took about 3 days to build letting it dry slowly.
To make the tiles, clay was collected and had the sticks and stones taken out of it. Then I crushed up old broken pottery and tiles I made before which I mixed with the clays as grog (stops clay from cracking). A tile frame was made from a split piece of lawyer cane bent into a trapezoidal shape about 50 cm long, 20 cm at the wide end and 16 cm at the narrow end. This was put on a flat stone. Wood ash was put down to stop the clay sticking to the rock. The clay was pressed into the fame and the wet tile was slid onto a curved piece of wood to form the curved shape of the barrel tile. The tile was then moved immediately to a flat area and the piece of wood was slid out so the tile sat on the ground to dry. Being curved, air could get under the tile to help dry it out. 
I could make 30 tiles easily in a day and only had 150 to make. But it kept raining and destroying the tiles before they dried. So I had to make 30 tiles, let them dry enough to be moved, then take them to the tiled hut where they were force dried on the ondol (fire heated bed). The majority of the time spent on this project was re-making broken tiles due to unseasonal rain (I don’t think we have a proper dry season here anymore, this is what held up my other tiled hut too). So this whole part probably took 4 weeks.
Firing the tiles was easy compared to the other tiled hut I built. I could fit 30 tiles in the kiln at once and had 150 tiles to fire. The 5 firings took 5, 4.5, 3.5, 4.5 and 3.5 hours. The first one probably took longer due to the kiln not being dry yet and the 4th firing took a while due to wet firewood. Tiling the roof was also easy. Starting at one end, tiles were laid so that the concavity faced up and the narrow end pointed into the next tile below acting like a shoot for water to run down. The gaps between these tiles was covered using a tile with the concavity facing down and the narrow end pointing up under the next tile above. The ridge of the hut was covered with the same tiles interlocking to keep rain out. The low roof pitch, the weight and friction of the tiles, the fact that they interlock all help to keep the tiles in place meaning they don’t need tabs or pegs to hold them in place.
The roof sheds rain and is fireproof. This will provide a workplace for fire related projects in all weather. Walls were not built as this is a place for working and storing firewood, not sleeping and staying warm. Also, light can come in so it’s easy to see during work. The kiln worked ok and was able to handle a larger volume of tiles than the previous kiln I built (having over 4 times the volume) though I might investigate better kiln designs in future to attain higher temperatures and use less firewood. The roof of this shed has a lower angle to my other huts meaning it has more headroom. Ideally barrel tiles should be used at about 30 degrees as opposed to the 22.5 I used but being a small shelter I don’t think the water will build up and seep through. A large house would use a slightly steeper angle.


원시 기술 : 배럴 기와 창고


나는 우기 동안의 프로젝트 작업과 장작 보관을 위해 화재 및 비가 오는 대피소를 제공하기 위해 기와 지붕 헛간을 만들었습니다. 창고에는 자체 타일을 발사하는 데 사용 된 가마가 있습니다.
나는 돌 모자이크를 사용하여 목재를 자르고 그것을 건축 현장에 가져 갔다. 6 개의 직립 기둥이 반 미터 정도 땅에 꽂혔다. 선석을 사용하여 수평선에 모따기를 자르고 그 다음에 더운 석탄과 불어 파이프를 사용하여 더 큰 구멍을 뚫어서 더 많이 불 태우게했다. 이 광선은 제자리에 놓 였고 서까래는 변호사 지팡이로 채찍질되었습니다. 타일이 붙어있는 목재는 약 50cm 떨어져 있습니다. 완성 된 프레임은 평면도에서 2 x 2 m, 능선에서 2 m, 측면에서 1.5 m 높이다. 이 지붕 앵글은 약 22.5도, 보통 내가 만든 오두막의 절반 정도입니다. 이것은 약 일주일이 걸렸지 만 약 4 개월 전에 해봤 다. 다른 비디오를 보느라 바빴 기 때문에 사이트를 떠났다.
다음으로 나는 가마를 만들었다. 나는 개울에서 점토를 운반하기가 더 쉽도록 바구니를 만들었다. 나는 가마의 화실 상자를 파헤 치고 그것을 지탱하기 위해 막대기 아치를 사용하여 진흙 상자를 만들었다. 둥근 천장에 구멍을 뚫어 불길을 통과 시켰습니다. 가마 모양은 돔형 지붕이 달린 큐브였습니다. 그것은 사이트에서 진흙으로 만들어졌습니다 (크릭의 찰흙은 가마를 만들기에는 너무 좋으며 도기로 사용하는 것이 가장 좋습니다). 화격자 막대는 목재가 아닌 목재를 통해 공기가 들어 오도록하여 화분 연소 효율을 높이기 위해 화실에 설치되었습니다. 이것은 서서히 건조하게 만드는 데에만 약 3 일이 걸렸습니다.
타일을 만들기 위해 찰흙을 모으고 막대기와 돌을 꺼내었다. 그 다음 나는 낡은 깨진 도기와 타일을 짓 눌렀다. 그 전에 내가 점토로 섞은 것을 grog (크래킹에서 점토를 멈추게한다)로 섞었다. 타일 ​​프레임은 50cm 길이의 사다리꼴 형태로 구부러진 변호사 지팡이의 조각으로 만들어졌으며 넓은 끝은 20cm, 좁은 끝은 16cm로 만들었습니다. 이것은 평평한 돌 위에 올려 놓았다. 나무 재는 바위에 달라 붙는 찰흙을 멈추기 위해 내려졌습니다. 찰흙은 명성으로 눌러지고 젖은 도와는 구부려 진 나무 조각에 미끄러 져 배럴 타일의 곡선 모양을 형성했다. 타일은 그 다음 즉시 평평한 지역으로 옮겨졌고 나무 조각은 밖으로 밀려 나갔다. 구부러진 상태로 공기가 타일 밑으로 들어가 건조를 돕습니다.
나는 하루에 30 개의 타일을 쉽게 만들 수 있었고 150 개만 만들 수있었습니다. 그러나 그들은 건조하기 전에 비가 계속해서 비가 내렸다. 그래서 저는 30 개의 타일을 만들어야 만 움직일 수있을 정도로 말랐습니다. 그런 다음 타일을 붙인 오두막집으로 가져 가면 온돌 (온열 침대)에서 말라 버렸습니다. 이 프로젝트에 소비 된 대부분의 시간은 비 계절적인 비 때문에 부서진 타일을 재창조하는 것이 었습니다. (우리는 더 이상 여기 건전한 계절이 아니라고 생각합니다. 이것은 다른 타일 된 오두막을 너무 올려 놓았습니다.) 그래서이 부분 전체는 아마도 4 주 걸렸을 것입니다.
타일을 발사하는 것은 다른 타일로 만든 오두막에 비해 쉽습니다. 나는 한 번에 가마에 30 개의 타일을 넣을 수 있었고, 150 개의 타일을 발사 할 수있었습니다. 5 번 발사에는 5, 4.5, 3.5, 4.5 및 3.5 시간이 소요되었습니다. 첫 번째 것은 아마도 아직 건조되지 않은 가마로 인해 더 오래 걸렸을 것이고 4 번째 발사는 젖은 장작으로 인해 한참 걸렸을 것입니다. 지붕을 바둑판 식으로 배열하는 것도 쉬웠다. 한쪽 끝에서 시작하여 타일이 깔려 오목면이 위로 향하게되고 좁은 끝이 아래의 타일로 향하게되어 물이 아래로 떨어지도록 촬영합니다. 이 타일들 사이의 틈은 아래쪽을 향한 오목한면이있는 타일과 위의 다음 타일 아래를 가리키는 좁은 끝을 사용하여 덮여있었습니다. 오두막의 산등성이는 비가 내리기 위해 연동되는 동일한 타일로 덮여있었습니다. 낮은 지붕 피치, 타일의 무게와 마찰, 그들이 타일을 제 위치에 유지하는 데 도움이되는 것은 타일이나 펙을 필요로하지 않는다는 의미입니다.
지붕은 비를 내뿜으며 내화성이 있습니다. 이것은 모든 날씨의 화재 관련 프로젝트를위한 작업장을 제공 할 것입니다. 벽은 장작이 아니라 fire감을 저장하고 저장하기위한 장소이기 때문에 지어지지 않았습니다. 또한 빛이 들어올 수 있으므로 작업하는 동안 쉽게 볼 수 있습니다. 나는 더 높은 온도를 달성하고 더 적은 장작을 사용하기 위해 더 나은 가마 디자인을 조사 할 지 모르지만 가마는 잘 작동하고 내가 만든 이전 가마보다 많은 양의 타일을 처리 할 수있었습니다 (4 배 이상). 이 창고의 지붕은 다른 오두막에 비해 더 낮은 각도를 가지고있어 헤드 룸이 더 많습니다. 이상적으로 배럴 타일은 사용 된 22.5와 반대로 약 30도에서 사용해야하지만 작은 쉼터 인 나는 물이 쌓이지 않고 새어 나올 것이라고 생각하지 않습니다. 큰 집은 약간 가파른 각도를 사용합니다.


Primitive Technology: Forge Blower 원시 기술 : Forge Blower 단조송풍기

Primitive Technology: Forge Blower

I invented the Bow Blower, a combination of the bow drill and forge blower to make a device that can force air into a fire while being easy to construct from commonly occurring natural materials using only primitive technology. I began by fanning a fire with a piece of bark to increase its temperature. It is this basic principle I improved on throughout the project. 
Next, I made a rotary fan from two pieces of bark that slot together at right angles to each other to form a simple 4 bladed paddle wheel about 20 cm in diameter and 5 cm tall. The blades of the fan were not angled and were designed only to throw air outwards away from the axle when spun. The rotor of the fan was made by splitting a stick two ways so it formed 4 prongs. The fan was then inserted into the prongs and the end lashed to hold it in place. Spinning the fan rotor back and forth between the palms of the hands fanned the fire. But only some of the wind generated by the fan reached the fire. The rest of it was blowing in other directions, effectively being wasted.
So I built a fan housing from unfired clay to direct the air flow into the fire. This was basically an upturned pot with a hole in the top, a spout coming out of the side. The housing was about 25 cm wide and 8 cm tall. The hole in the top and the spout were both about 6 cm in diameter so that the air coming in roughly equalled the air coming out. The base of the fan rotor sat in a wooden socket placed in the ground to make it spin easier and the top of the rotor protruded from the hole in the top of the housing.
Now when the fan spun, air entered the hole in the top of the housing and exited the spout in the side. Importantly, it doesn’t matter which way the fan spins, air always goes into the inlet and out the spout. Air is thrown out towards the walls of the housing and can only leave through the spout while the vacuum in the centre sucks new air into the housing through the inlet. A separate clay pipe called a tuyere was made to fit over the spout to direct air into the coals. This was done because the pipe that touches the fire can melt away so it’s better to make this part replaceable.
Instead of making a large wheel and belt assembly to step up the speed of rotation, I opted for a 75 cm long bow. I made a frame to hold the rotor in place consisting of two stakes hammered into the ground with a socketed cross bar lashed on to hold the top of the rotor. I made bark fibre cordage and tied the end to a stick. I then looped the cord around the rotor and held the other end in the same hand holding the stick. I then pushed and pulled the bow causing the rotor to spin rapidly, forcing air into the fire. 
I made a simple mud furnace for the blower. Then I collected orange iron bacteria from the creek (iron oxide), mixed it with charcoal powder (carbon to reduce oxide to metal) and wood ash (flux to lower the melting point) and formed it into a cylindrical brick. I filled the furnace with charcoal, put the ore brick in and commenced firing. The ore brick melted and produced slag with tiny, 1mm sized specs of iron through it. My intent was not so much to make iron but to show that the furnace can reach a fairly high temperature using this blower. A taller furnace called a bloomery was generally used in ancient times to produce usable quantities of iron and consumed more charcoal, ore and labour. 
This device produces a blast of air with each stroke of the bow regardless of whether it is pushed or pulled. The bow makes it possible to operate the blower without using a complicated belt and wheel assembly used in traditional forge blowers. There is a brief pause at the end of each stroke where the fan stops to rotate in the other direction, but this is effectively no different to the intermittent blast of a double acting bellows of Europe or box bellows of Asia. The materials used (wood, bark, bark fibre and clay) are readily available on most continents. No leather, valves or precisely fitted piston gaskets are required as with other types of bellows. The cords for this device wear out often so a number of back up cords should be kept handy for quick replacement. In summary, this is an easy to make device that solves the problem of supplying forced combustion air required for high temperature furnaces and forges.


원시 기술 : Forge Blower  단조 송풍기

나는 Bow Drill과 Bow Drury를 결합하여 공기를 불 속에 넣을 수있는 장치를 만들었으며 원시 기술만으로도 일반적으로 발생하는 천연 재료로 쉽게 구성 할 수있었습니다. 나는 껍질 조각으로 불을 휘감면서 온도를 올리기 시작했다. 프로젝트 전체에서 개선 된 것은이 기본 원칙입니다.
다음으로, 직경 20cm, 높이 5cm의 단순한 4 개의 블레이드 형 외륜을 형성하기 위해 두 개의 나무 껍질을 서로 직각으로 결합하여 회전 팬을 만들었습니다. 팬의 블레이드는 각을 이루지 않았으며 회전 할 때 차축에서 멀리 공기를 배출하도록 설계되었습니다. 팬의 회 전자는 스틱을 두 가지 방법으로 분할하여 만들어 4 각진을 이루었습니다. 그런 다음 팬을 프롱에 삽입하고 끝 부분을 제자리에 고정시킵니다. 손바닥 사이에서 팬 로터를 앞뒤로 돌리면 불이났다. 그러나 팬이 생성 한 바람의 일부만이 화재에 이르렀습니다. 그 나머지는 다른 방향으로 불고 있었고 효과적으로 낭비되었습니다.
그래서 저는 불기둥 진흙으로 팬 하우징을 만들어 공기 흐름을 불에 넣었습니다. 이것은 기본적으로 위쪽에 구멍이있는 위로 향한 냄비, 옆으로 나오는 스파우트였습니다. 주택은 폭이 약 25cm, 높이가 8cm였다. 상단의 구멍과 스파우트는 직경이 약 6cm 였기 때문에 들어오는 공기와 대략 같은 공기가 나오게되었습니다. 팬 회 전자의 바닥은 땅속에있는 나무로 된 소켓에 앉았고 회전하기 쉽고 회 전자의 상단은 하우징 상단의 구멍에서 돌출되었습니다.
이제 팬이 회전 할 때 공기가 하우징 상단의 구멍으로 들어 와서 측면의 주둥이를 나갔습니다. 중요하게도, 팬이 회전하는 방식에 상관없이 항상 공기가 입구와 출구로 흐릅니다. 공기는 하우징의 벽을 향해 배출되고 중앙의 진공이 입구를 통해 새 공기를 하우징으로 흡입하는 동안에 만 스파우트를 통과 할 수 있습니다. 송풍구에 공기를 직접 보내기 위해 송풍구에 맞게 송풍기라고 불리는 별도의 점토 관을 만들었습니다. 화재에 닿는 파이프가 녹아 없어 졌기 때문에이 부분을 교체 할 수 있도록하는 것이 좋습니다.
회전 속도를 높이기 위해 커다란 휠과 벨트 어셈블리를 만드는 대신, 나는 75cm 길이의 활을 선택했습니다. 나는 로터의 꼭대기를 잡아 두는 소켓 십자형 막대가있는 땅에 두 개의 막대기가 닿는 곳에 로터를 고정시키기위한 프레임을 만들었다. 나는 껍질 섬유 끈을 만들고 끝을 막대기에 묶었습니다. 그런 다음 회 전자 주변의 코드를 반복하고 막대기를 잡고 같은 손으로 다른 쪽 끝을 잡았습니다. 나는 활을 밀고 당겨서 로터가 빠르게 회전하여 공기가 불에 들어갔다.
나는 블로어를위한 간단한 진흙로를 만들었다. 그런 다음 크릭 (산화철)에서 주황색 철 박테리아를 모으고 숯 가루 (산화 탄소를 금속으로 환원하는 탄소)와 나무 재 (융점을 낮추는 플럭스)와 혼합하여 원통형 벽돌로 만들었습니다. 용광로에 숯을 채우고 광석 벽돌을 넣은 다음 발포를 시작했습니다. 광석 벽돌은 용융되어 1mm 크기의 작은 철제 규격으로 슬래그를 생산했습니다. 제 의도는 철분을 만드는 것이 아니라이 송풍기를 사용하여 용광로가 상당히 높은 온도에 도달 할 수 있음을 보여줍니다. Bloomery라고 불리는 더 높은 용광로는 일반적으로 철의 사용 가능한 양을 생산하고 더 많은 숯, 광석 및 노동을 소비하기 위해 고대에는 사용되었습니다.

이 장치는 밀거나 당기는 것과 관계없이 활의 각 스트로크에서 공기의 폭발을 일으 킵니다. 활은 전통적인 단조 송풍기에 사용되는 복잡한 벨트 및 휠 어셈블리를 사용하지 않고 송풍기를 작동 할 수있게합니다. 팬이 다른 방향으로 회전하는 것을 멈추는 각 스트로크 끝에 짧은 일시 정지가 있지만 이것은 유럽의 복동 벨로우즈 또는 아시아의 상자 벨로우즈의 간헐적 인 돌풍과 실질적으로 다르지 않습니다. 사용 된 재료 (목재, 나무 껍질, 껍질 섬유 및 찰흙)는 대부분의 대륙에서 쉽게 사용할 수 있습니다. 다른 유형의 벨로우즈와 마찬가지로 가죽, ​​밸브 또는 정확하게 피스톤 가스켓이 필요하지 않습니다. 이 장치의 코드가 자주 마모되므로 빠른 교체를 위해 여러 백업 코드를 보관해야합니다. 요약하면, 이것은 고온 용광로 및 단조에 필요한 강제 연소 공기 공급 문제를 해결하는 장치를 만들기 쉽습니다.

ㅋㅋㅋㅋㅋㅋㅋㅋㅋㅋ


Primitive Technology: Grass hut 원시 기술 : 잔디 오두막

Primitive Technology: Grass hut

I built this grass hut up on a ridge. It's roughly parallel with the tiled hut and wattle and daub hut that are a couple of hundred meters away down in a valley. I built it on a ridge to get away from mosquitoes in wet weather. This project took 7 days to make. I looked for a spot and cleared it on the first day, built the frame on the second, and spent the next 5 collecting grass. The type of grass is Guinea grass, an introduced species here in Australia meant for live stock. This grass is difficult to collect in this dry forest and I had to climb further into the mountain to get it. 
The design is a simple pointed dome that's easy to build. The tools used were simply sharp stones and a digging stick. It's 2.5 m wide and 2 m tall. 8 lawyer cane strips were driven into the ground to form the ribs of the structure and hoops of cane were put over this to attach the grass to. Vine was used to tie the frame together and to tie handfuls of long grass to it. When the hut was almost finished a cap was made and lifted onto the top of the dome to finish it. 
This hut is easy to build and houses a large volume. The shape is wind resistant and strong for it's materials. Gaps can be seen in the thatch but not if viewing from directly underneath meaning that it should shed rain well. A fire should be possible in the hut as long as it's small and kept in a pit in the center.The reason the hut took so long is due to the scarcity of grass on the hill. It could be built much quicker in a field.


원시 기술 : 잔디 오두막

나는이 풀 헛을 능선에 세웠다. 계곡에서 수 백 미터 떨어진 계단식 오두막집과 wattle and daub 오두막집과 거의 비슷합니다. 나는 그것을 습기가 많은 날씨에 모기에서 벗어나기 위해 능선에 세웠다. 이 프로젝트는 7 일이 걸렸습니다. 나는 지점을 찾고 첫날에 그것을 지우고 두 번째 프레임을 만들고 다음 5 개의 풀을 썼다. 잔디의 종류는 기니 풀 (Guinea grass)입니다. 오스트레일리아에서는 여기에 소개 된 종입니다. 이 풀은이 마른 숲에서 수집하기가 어렵습니다. 그리고 나는 그것을 얻기 위해 산으로 더 올라야했습니다.
디자인은 쉽게 작성할 수있는 단순한 뾰족한 돔입니다. 사용 된 도구는 단순한 날카로운 돌과 파기 막대기였습니다. 폭이 2.5 미터, 높이가 2 미터입니다. 8 개의 변호사 지팡이 조각을지면에 밀어 넣어 구조의 갈비뼈를 만들고 지팡이의 고리를 풀어 잔디를 붙이십시오. 덩굴은 프레임을 묶고 긴 풀 한 켤레를 묶는 데 사용되었습니다. 오두막이 거의 끝나면 뚜껑을 만들어 돔 꼭대기로 들어 올려 끝내게됩니다.

이 오두막은 건축하기 쉽고 많은 양을 수용합니다. 모양은 바람에 강하고 재료에 강합니다. 틈새는 초가집에서 볼 수는 있지만 바로 아래에서 볼 때 비가 잘 내리는 의미는 아닙니다. 오두막이 작고 중앙에 구멍이있는 한 오두막에서 화재가 발생해야합니다. 오두막이 너무 오래 걸린 이유는 언덕에 잔디가 없기 때문입니다. 그것은 현장에서 훨씬 빨리 지어 질 수 있습니다.


ㅋㅋㅋㅋㅋ


Primitive Technology: Bow and Arrow 원시 기술 : 활과 화살

I made this bow and arrow using only primitive tools and materials.The bow is 1.25 m (55 inches) long and shoots 60 cm (2 feet) long arrows. I don't know the draw weight - safe to say greater than 15 kg (35 pounds) perhaps? The stave was made from a tree ,Northern Olive (Chionanthus ramiflora), that was cut with a stone axe and split in half with a stone chisel. One half was used for the bow and was cut to a length of 1.25 m (50 inches). The limbs of the bow were carved with various stone blades so that the limbs tapered in width, and to a lesser extent depth, towards the tips. The middle of the bow was narrowed in width to form a handle about 12.5 cm (5 inches) long. The string was made from the inner bark of a fibrous tree. It was separated into thin strips and left to dry. Then it was twisted into cordage. Arrows were made of the same wood as the bow and were 60 cm (2 feet) long. A notch was carved into the back to accept the bow string. They were fletched with bush turkey feathers picked up from the ground (no turkeys were harmed in the making of this video). A feather was split in half and cut into 3 lengths then resin and bark fiber attached the fletching on to the arrows. The tip of the arrow was fire hardened and sharpened to a point. The fletching was trimmed using a hot coal. Each arrow took about an hour to make. A quiver was made of bark to hold the arrows. Importantly, the quiver was worn on the back in the historically accurate style of native American and African archers- not on the hip like medieval European archers (see back quiver: https://en.wikipedia.org/wiki/Quiver ). I cleared a shooting range with a semi rotten log as a target instead of a hay bale. At 10 meters the accuracy was better than 50 % for this narrow target and the arrows stuck into the wood enough so that they were difficult to pull out. The bow was durable, shooting about 200-300 times with the string breaking only 3 times. I made a back up string and repaired them by splicing the ends back together. In conclusion this was an easy bow to make. The short design makes it easy to find a straight piece of wood for the stave. A short string is also easy to make and short arrow shafts are easy to find. Short bows shoot fast and are easy to carry in thick forest. The dimensions of the bow were based on those given in the SAS Survival Handbook by john Lofty Wiseman. but instead of carving it from a stave from the start, I split the stave and then carved it. I think this requires less time, effort and skill. It also gives a flat bow design that's unlikely to break. It does require wood that doesn't twist much when split though.


나는이 활과 화살을 원시 도구와 재료만을 사용하여 만들었습니다. 활은 1.25m (55 인치) 길이이고 60cm (2 피트)의 긴 화살을 쏘습니다. 나는 끌기 무게를 모른다 - 아마 15 킬로그램 (35 파운드)보다는 더 중대한 말하기 위하여 안전한가? 그 구멍은 나무로 만든 북부 올리브 (Chionanthus ramiflora)로, 돌 도끼로 자르며 돌 조각으로 반으로 나뉘었다. 하나의 반은 활에 사용되었고 1.25m (50 인치)의 길이로 절단되었습니다. 나비의 팔다리는 다양한 석재 날로 새겨 져서 팔다리는 폭이 좁고 깊이는 줄었다. 활의 가운데는 너비가 좁아서 길이가 약 12.5cm (5 인치) 인 손잡이를 형성합니다. 끈은 섬유질 나무의 안쪽 껍질에서 만들었다. 그것은 얇은 스트립으로 분리되어 말라 버렸다. 그런 다음 그것은 밧줄로 꼬여있었습니다. 화살은 활과 같은 나무로 만들어졌으며 길이는 60cm (2 피트)였습니다. 활 문자열을 받아들이 기 위해 노치가 뒷면에 새겨 져 있습니다. 그들은 땅에서 뽑힌 부시 대통령의 칠면조 깃털 (이 비디오를 만들 때 칠면조가 피해를 입지 않았습니다)로 날치기 시작했습니다. 깃털은 반으로 갈라지고 3 개의 길이로 자르고 그 후에 수 지 및 껍질 섬유는 fletching를 화살에 붙였다. 화살의 끝은 불에 단단 해지고 점으로 날카롭게되었다. 플레 칭은 뜨거운 석탄을 사용하여 정돈되었습니다. 각 화살표는 만드는 데 약 한 시간이 걸렸습니다. 떨림은 화살을 잡기 위해 껍질로 만들어졌습니다. 중요한 것은 떨리는 떨림이 역사적으로 정확한 미국 원주민과 아프리카 원숭이의 스타일로 뒤에서 입었습니다. 중세 유럽의 궁수들과 같은 엉덩이가 아닙니다 (https://en.wikipedia.org/wiki/Quiver 참조). 건초 베일 대신 반 썩은 로그를 대상으로 사격장을 정리했습니다. 10 미터에서 정확도는이 좁은 표적에 대해 50 %보다 좋았으며 화살표는 나무 안으로 꽂혀 빠져 나오기가 어려웠습니다. 활은 내구성이 좋았고, 문자열이 약 3 번만 끊어지면서 약 200-300 번 촬영되었습니다. 나는 줄을 만들어 다시 끝을 연결하여 그들을 수리했다. 결론적으로 이것은 쉽게 만들 수있는 것이었다. 짧은 디자인으로 구멍을 뚫을 수있는 직선형 나무를 쉽게 찾을 수 있습니다. 짧은 끈은 쉽게 만들 수 있으며 짧은 화살 축은 찾기 쉽습니다. 짧은 활은 빠르게 쏘고 두꺼운 숲에서 쉽게 나옵니다. 활의 치수는 john Lofty Wiseman의 SAS Survival Handbook에 제공된 것을 기준으로합니다. 처음부터 구멍에서 조각하는 대신 구멍을 뚫고 조각 한 것입니다. 시간과 노력과 기술이 적게 든다고 생각합니다. 또한 깨지기 쉬운 플랫 보우 디자인을 제공합니다. 쪼개 질 때 많이 뒤틀리지 않는 목재가 필요합니다.
.
.
.
.
.
.


Primitive Technology: Charcoal 원시 기술 : 목탄

Primitive Technology: Charcoal

I made a batch of charcoal using the mound method then stored it in baskets for later use. Charcoal is a fuel that burns hotter than the wood it's made from. This is because the initial energy consuming steps of combustion have taken place while making the charcoal driving off the volatile components of the wood (such as water and sap). The result is a nearly pure carbon fuel that burns hotter than wood without smoke and with less flame. Charcoal was primarily a metallurgical fuel in ancient times but was sometimes used for cooking too. To make the charcoal the wood was broken up and stacked in to a mound with the largest pieces in the center and smaller sticks and leaves on the out side. The mound was coated in mud and a hole was left in the top while 8 smaller air holes were made around the base of the mound. A fire was kindled in the top of the mound using hot coals from the fire and the burning process began (the hot coals are being poured in the top using a small pot at 2:38). The fire burned down the inside of the mound against the updraft. I reason that this is a better way to make charcoal as the rising flames have used up the oxygen and prevent the charcoal already made above them from burning while driving out even more volatiles . I watched the air holes at the base of the mound and when the fire had burned right up to each opening I plugged them with mud. Once all 8 holes had be sealed the hole in the top of the mound was sealed with mud and the mound left to cool. From lighting the mound to closing up the holes the whole process took about 4 hours. The next day when the mound was cool to the touch (this can take about 2 days sometimes) I opened the mound. The resulting charcoal was good quality. Some wood near the air entries had burned to ash though these were only small twigs and leaves. This is the reason small brush is put on the out side of the mound, to be burned preferentially to the larger wood on the inside thus protecting the large pieces of charcoal. The charcoal that was made was hard and shiny. When broken open it had the ray structure of the wood preserved. When moving the hand through it the charcoal sounded tinny, like coral on a beach being moved by waves. These are signs of good quality. Bad charcoal is soft, breaks easily and has a muffled sound. I intend to use the charcoal to produce hotter fires than I'm able to with wood alone. From my research, a natural draft furnace using wood (a kiln) can reach a maximum of 1400 c degrees whereas a natural draft furnace using charcoal can reach 1600 c degrees. Achieving high temperatures is necessary for changing material to obtain better technology (e.g. smelting ore into metal).


원시 기술 : 목탄 나는 마운드 (mound) 방법을 사용하여 목탄을 만들었고 나중에 사용하기 위해 바구니에 보관했습니다. 숯은 나무로 만든 것보다 뜨겁게 타는 연료입니다. 이것은 나무의 휘발성 구성 요소 (예 : 물과 수액)에서 숯을 몰아내는 동안 연소의 초기 에너지 소비 단계가 발생했기 때문입니다. 결과는 거의 순수한 탄소 연료로 연기가없고 화염이 적은 목재보다 더 덥습니다. 숯은 고대에는 주로 야금 연료 였지만 때로는 요리에도 사용되었습니다. 목탄을 만들기 위해 나무는 부서지면서 중앙의 가장 큰 조각과 바깥 쪽의 더 작은 스틱과 잎이있는 마운드에 쌓아 올려졌습니다. 마운드는 진흙에 코팅되었고, 구멍은 상부에 남아 있었고 8 개의 작은 공기 구멍이 마운드의 바닥 주위에 만들어졌습니다. 불의 뜨거운 석탄을 사용하여 마운드 상단에 불이 태우고 불타는 과정이 시작되었습니다 (2시 38 분에 작은 화분을 사용하여 뜨거운 석탄이 쏟아졌습니다). 화재가 상승 기류에 대한 마운드 내부를 태웠다. 나는 이것이 상승하는 불길이 산소를 다 써 버리고 더 많은 휘발성 물질을 몰아 내면서 이미 위에서 만든 숯이 타는 것을 막아서 숯을 만드는 더 좋은 방법이라고 생각합니다. 나는 마운드의 바닥에있는 공기 구멍을 보았고 화재가 각 개구부까지 불타 버렸을 때 나는 진흙으로 막혔다. 모든 8 개의 구멍이 봉쇄되면 마운드 상단의 구멍이 진흙으로 밀봉되고 마운드는 냉각되었습니다. 마운드에 불을 붙이는 것에서 구멍을 막는 것까지 전체 과정에는 약 4 시간이 걸렸습니다. 다음날 마운드가 차갑 때 (이 때로는 약 2 일이 걸릴 수 있습니다) 나는 마운드를 열었습니다. 그 결과 목탄은 좋은 품질이었습니다. 이것이 작은 나뭇 가지와 잎일지라도 공기 입구 근처의 어떤 나무는 화산재로 불타 버렸다. 이것이 작은 붓이 마운드의 바깥쪽에 놓여 져서 내부의 큰 나무에 우선적으로 타서 숯의 큰 부분을 보호하는 이유입니다. 숯은 단단하고 반짝였다. 파손되었을 때 나무의 광선 구조가 보존되었습니다. 그것을 통해 손을 움직일 때 목탄은 파도에 의해 움직이는 해변의 산호처럼 주석이 들렸다. 이것들은 양질의 표시입니다. 나쁜 목탄은 부드럽고 쉽게 부서지며 소리가 불규칙하다. 나는 숯을 사용하여 목재만을 사용하는 것보다 더 뜨거운 불을 낼 생각입니다. 내 연구에서, 목재를 사용하는 자연 용광로 (가마)는 최대 1400도까지 도달 할 수 있지만 목탄을 사용하는 자연 용광로는 1600도까지 도달 할 수 있습니다. 더 높은 기술을 얻기 위해 물질을 변화시키기 위해서는 고온을 달성하는 것이 필요합니다 (예 : 금속으로 제련하는 광석).

Primitive Technology: Cord drill and Pump drill 원시 기술 : 코드 드릴 및 펌프 드릴

Primitive Technology: Cord drill and Pump drill


I made a cord drill and then upgraded it to a pump drill. A cord drill is basically a spindle with a fly wheel attached so it looks like a spinning top. the middle of a piece of cord is then put into a notch at the top of the spindle. The ends of the cord are then wrapped around the spindle and then pulled quickly outwards causing the drill to spin. The momentum of the fly wheel causes the cord to wrap back around the spindle in the other direction. When it stops the cords are pulled outwards again and the drill spins in the other direction. I made the first one with a stone flywheel then made fire with it in the same way I make fire with fire sticks. Then I made and fired some clay fly wheels, made another drill with one of the fly wheels and fitted a stone drill bit to the end. This one I use for drilling holes in wood. I used the new drill to make a hole in a piece of wood. I then put the spindle of the original cord drill through the hole in the wood, tied the ends of the cord onto the piece of wood and it became a pump drill. The cords were wrapped round the spindle as normal but now a pumping action of the wooden cross bar created the same action. This was an interesting project. For fire making I'd stick to fire sticks because the equipment is easier to make. But for people with soft hands they could use the cord drill as it won't give them blisters. It should be added that the pump drill actually took longer than the cord drill (cord: 32 seconds, pump 1 min 30 seconds -the pump drill scene was edited down to make it watchable). The pump drill had more moving parts and was constantly having problems. As a fire making method I'd choose the cord drill over the pump drill unless all the parts were well made. The main purpose I'd use these tool for is drilling holes rather than fire making. It was reasonably good but the stone bits I made could be improved and their attachment to the shaft also needs some thought. If the bit loosens and gets off axis slightly the whole thing wobbles. These drills are impressive inventions and show potential for carpentry use later on.


원시 기술 : 코드 드릴 및 펌프 드릴 나는 코드 드릴을 만들고 펌프 드릴로 업그레이드했습니다. 코드 드릴은 기본적으로 회전 휠이 부착 된 스핀들이므로 회전 톱처럼 보입니다. 코드의 중간 부분이 스핀들 상단의 홈에 넣어집니다. 코드의 끝은 스핀들에 감겨 서 빠르게 바깥쪽으로 당겨 드릴을 회전시킵니다. 플라이 휠의 추진력으로 인해 코드가 다른 방향으로 스핀들을 감 쌉니다. 코드가 멈 추면 코드가 바깥 방향으로 다시 당겨지며 드릴이 다른 방향으로 회전합니다. 돌을 든 첫 번째 플라이휠을 만들어 화재와 같은 방식으로 화재로 만들었습니다. 그 다음 나는 점토 플라잉 휠을 만들고 해고하고, 플라이휠 중 하나를 사용하여 다른 드릴을 만들고 끝에 석재 드릴 비트를 장착했습니다. 이것은 내가 나무에 구멍을 뚫기 위해 사용하는 것입니다. 새 드릴로 나무 조각에 구멍을 냈습니다. 그런 다음 원래 코드 드릴의 스핀들을 나무 구멍에 넣고 코드 끝을 나무 조각에 묶어 펌프 드릴이되었습니다. 코드는 정상적으로 스핀들 둘레에 감 겼지 만 이제는 나무로 된 크로스 바의 펌핑 작용으로 동일한 동작이 생성됩니다. 이것은 흥미로운 프로젝트였습니다. 소방용으로는 장비를 만들기가 쉽기 때문에 불에 붙어 있습니다. 그러나 부드러운 손을 가진 사람들에게는 물집을주지 않기 때문에 코드 드릴을 사용할 수 있습니다. 펌프 드릴이 코드 드릴보다 실제로 오래 걸렸다는 것을 추가해야합니다 (코드 : 32 초, 펌프는 1 분 30 초 - 펌프 드릴 장면은 시계를보기 쉽게하기 위해 편집되었습니다). 펌프 드릴은 움직이는 부분이 더 많았고 끊임없이 문제가있었습니다. 모든 부품이 잘 만들어진 경우가 아니라면 화재 제작 방법으로 펌프 드릴 위로 코드 드릴을 선택했습니다.  이 도구를 사용하는 주요 목적은 화재가 아닌 구멍을 뚫는 것입니다. 그것은 합리적으로 좋았지 만, 내가 만든 돌 조각은 향상 될 수 있었고, 샤프트에의 부착은 또한 약간의 생각이 필요했다. 비트가 느슨해지면 축을 약간 벗어나면 모든 것이 흔들립니다. 이 훈련은 인상적인 발명품이며 나중에 목공 용품의 사용 가능성을 보여줍니다.


Primitive Technology: Baskets and stone hatchet 원시 기술 : 바구니와 돌 도끼

Primitive Technology: Baskets and stone hatchet


I made 2 types of basket and a celt hatchet. The first type of basket made was a coil basket. Bunches of palm leaves where wrapped in thin strips of lawyer cane to for a coil. This was then coiled into a spiral with each coil being tied to the last to keep it in place. This was done by sewing a new section of coil to the previous one. The basket was given a flat base so it could stand up but could be made any shape. The second basket was made of lawyer cane. It started with thick strips of cane placed on the ground crossing in the centers to form an asterix shape. Importantly another half a lawyer strip was added so that the number of spokes the basket had was odd- even numbers don't work with this type of basket. The canes were tied together in the center with a strip of bark and a piece of cane was woven in a spiral around the spokes like a spider web. When the base was wide enough the spokes were bent up to form the vertical sides of the basket. The weaving continued up the walls to the top and the ends of the spokes folded down back into the basket. The coil method was very time consuming (about a week on and off) and made a heavy basket but used simple materials and had few gaps in it. Long grass could be used instead of palm leaves and any type of ties could be used to bind the coils. This type of basket can look very neat if done carefully (the one I made was rough). Also I would add that circular or rectangular mats might be made using this method and these materials. This might provide thick padding against the ground for sitting and sleeping and when finished could be rolled up and stored out of the way. The woven cane baskets were much faster to make (2 or 3 hours each including harvesting materials). They used fewer materials and were lighter too. I could have easily made them bigger but wanted them to fit through the narrow door of the tiled hut. The baskets will be used mainly for storing charcoal inside huts out of the rain but are also useful for carrying leaf mulch for the garden. They have flat bases meaning they can stand upright and even be stacked on top of each other. I also made a small celt hatchet for lighter work. The big celt I made is useful for chopping bigger trees but is overkill for saplings and smaller trees. The method used was basically the same for the big celt though this time I used no fire hardening. The handle came from a branch cleared from the the sweetpotato patch and had sat for a few months seasoning on the ground. It was much harder to shape than green wood but was hard enough to not need fire hardening. So far I've used it without the handle splitting though the basalt head chipped when trying to chop dry eucalyptus branches (an especially hard wood)- I re sharpened it and it works on other woods ok.


원시 기술 : 바구니와 돌 도끼 나는 2 종류의 바구니와 celt 도끼를 만들었다. 첫 번째 유형의 바구니는 코일 바구니였습니다. 손바닥 뭉치는 변호사 지팡이의 얇은 띠로 코일에 싸여 있습니다. 이것은 나선형으로 감겨져 각 코일은 마지막에 묶여 고정되어 있습니다. 이것은 코일의 새로운 부분을 이전 부분에 바느질함으로써 이루어졌습니다. 바스켓에는 평평한 받침대가 달려있어 일어 서서 어떤 모양으로도 만들 수있었습니다. 두 번째 바구니는 변호사 지팡이로 만들어졌습니다. 그것은 아스테릭스 모양을 형성하기 위해 센터에서 교차하는 땅에 둔 지팡이의 두꺼운 스트립으로 시작되었습니다. 중요한 것은 또 다른 절반의 변호사 띠가 추가되어 바구니가 갖고있는 쐐기 수가 홀수가되었다는 것입니다. 심지어 짝수는이 바구니의 바구니에서 작동하지 않습니다. 지팡이는 중앙에 껍질 끈으로 묶여 있었고 지팡이 조각은 거미줄처럼 쐐기 주위에 나선형으로 짜여져있었습니다. 기저부가 충분히 넓 으면 스포크가 구부러져 바구니의 수직면을 형성했습니다. 직조는 벽 위로 올라가고 쐐기의 끝은 바구니에 다시 접혀 들어갔다. 코일 방법은 매우 시간이 많이 걸렸고 (약 1 주일간 켜고 끌 수 있음) 무거운 바구니를 만들었지 만 단순한 재료를 사용하고 그 안에 간격이 거의 없었다. 종려 잎 대신 긴 잔디를 사용할 수 있으며 코일을 묶는 데 사용할 수있는 모든 유형의 타이가 있습니다. 이 유형의 바구니는 조심스럽게 다뤄지면 깔끔하게 보일 수 있습니다. 또한 원형 또는 직사각형 매트를이 방법과 이러한 재료를 사용하여 만들 수 있다고 덧붙였습니다. 이것은 착석 및 수면을위한지면에 대한 두꺼운 패딩을 제공 할 수 있으며, 끝나면 롤업되어 저장 될 수 있습니다. 짠 지팡이 바구니는 훨씬 빨리 만들 수 있습니다 (수확 재료를 포함하여 각각 2 시간 또는 3 시간). 그들은 적은 재료를 사용하고 가볍습니다. 나는 쉽게 그들을 더 크게 만들 수 있었지만 타일로 된 오두막의 좁은 문을 통과하기를 원했습니다.  바구니는 비가 오는 오두막 안에 숯을 저장하는 데 주로 사용되지만 정원용 잎 뿌리 덮개를 휴대하는데도 유용합니다. 평평한 바닥을 가지고있어서 똑바로 서서 서로 겹칠 수 있습니다. 나는 또한 가벼운 작업을 위해 작은 celt 도끼를 만들었습니다. 내가 만든 커다란 껍질은 더 큰 나무를 자르는데 유용하지만, 묘목과 작은 나무에는 과잉이다. 사용 된 방법은 큰 켈트와 기본적으로 같았습니다. 이번에는 아무런 굳지 않았지만. 손잡이는 감미료 패치에서 제거 된 지사에서 나온 것이고 몇 달 동안 땅에 양념을하여 앉았습니다. 녹색 목재보다 모양을 만드는 것이 훨씬 어려웠지 만 불 경화가 필요하지 않을만큼 충분히 튼튼했습니다. 지금까지 나는 건조한 유칼립투스 가지 (특히 단단한 나무)를 자르려고 할 때 부서진 현무암 머리가 부서졌지만 손잡이를 쪼개지 않고 사용했습니다 - 특히 날카롭게하고 다른 숲에서 잘 작동합니다.

Primitive Technology: Sling 원시 기술 : 슬링

Primitive Technology: Sling  원시 기술 : 슬링

A sling is a weapon used to fire rocks farther and harder than could be thrown by hand alone. I made this sling from bark fiber that I made into cord. The cord was then tied in such a way to produce an area in the middle with three cords. A strip of the same bark fiber was woven between these to form a pouch. A loop was tied at one end of the sling and a knot tied in the other.
To use it, the loop is slipped over the finger and the knot is held down with the thumb. A stone is placed in the pouch and the sling swung over head. At the appropriate time the sling is swung forward in a throwing action and the knot held in the hand is let go. This causes the pouch to open and the stone to fly (hopefully) towards the target.
I hadn't used a sling for eight years but the first target I set up and filmed, a potsherd on a stick at 10 m, was hit first go! Next I set up a log at 20 m and required more practice. Targets of potsherds and tiles at 10 m were set up in a clearing. Tiles on sticks at 15 m were set up in a stretch of creek. The last shots are back in the clearing at 10 m. 
Learning to use the sling is difficult and practice is necessary. When aiming line up the swinging plane of the sling with the target to determine Y-axis aspect and use release timing to determine x-axis aspect. With timing (right handed) too early and the stone will got to the right, too late and it will go left. Practice to make it go at the right time. Use larger stones as they swing slower and are easier to time. Use smooth stones so they fly straight and don't cling to the pouch when released. 
The advantage of the sling is that it's easy to make, portable and the ammunition (stones) are every where. The disadvantages are it's difficult to learn to use accurately, noise and movement give it away when used, it can't penetrate a target like an arrow (unless using some kind of weighted dart) and it can't be fired in thick forest. Interestingly, the sling has a range comparable to a bow. From my research, the record for the longest sling shot was 505 m and that of the bow just under 500 m. For some great information on slings and slinging look at: 


슬링은 손으로 던져 질 수있는 것보다 멀리 더 멀리 바위를 발사하는 데 사용되는 무기입니다. 나는이 끈을 내가 끈으로 만든 껍질 섬유에서 만들었다. 그런 다음 코드를 3 개의 코드로 중간 부분을 만드는 방식으로 묶었습니다. 동일한 껍질 섬유의 스트립을 이들 사이에 엮어서 주머니를 형성 하였다. 루프는 슬링의 한쪽 끝에 묶 였고 다른 쪽에서는 매듭이 묶여있었습니다.
그것을 사용하기 위해, 루프는 손가락 위로 미끄러지고 매듭은 엄지 손가락으로 누르고 있습니다. 돌을 주머니에 넣고 슬링을 머리 위로 던지십시오. 적절한 시간에 던지기 동작에서 슬링을 앞쪽으로 휘두르고 손에 들고있는 매듭을 풀어줍니다. 이것은 파우치가 열리도록하고 돌은 목표물쪽으로 날아갑니다.
나는 8 년 동안 슬링을 사용하지 않았지만 내가 처음 세팅하고 촬영 한 대상은 10m의 막대기에 달린 potsherd였다. 다음으로 나는 20 미터 지점에 로그를 설치했고 더 많은 연습이 필요했다. 10m의 potsherds와 tiles의 표적이 청산에 설치되었다. 15m의 지팡이에 타일을 한 덩어리로 설치했습니다. 마지막 슛은 10 미터 지점에 있습니다.
슬링을 사용하는 것을 배우는 것은 어렵고 연습이 필요합니다. 조준 할 때 표적과 함께 슬링의 스윙면을 정렬하여 Y 축 측면을 결정하고 릴리스 타이밍을 사용하여 X 축 측면을 결정합니다. 타이밍 (오른 손잡이)이 너무 일찍 지나면 석기가 너무 늦게 오른쪽으로 가고 왼쪽으로 갈 것입니다. 적절한시기에 실행하도록 연습하십시오. 그들이 더 천천히 스윙하고 더 쉽게 시간을 보내는 것처럼 큰 돌을 사용하십시오. 매끄러운 돌을 사용하여 똑바로 날아갈 때 파우치에 달라 붙지 않습니다.

슬링의 장점은 휴대하기 쉽고 탄약 (돌)이 모든 곳에 있다는 것입니다. 단점은 정확하게 사용하는 법을 배우는 것이 어렵다는 것이고, 소음과 운동은 사용할 때 멀리 떨어지게하고, 화살표와 같은 대상을 관통 할 수 없으며 (어떤 종류의 무게가있는 다트를 사용하지 않는 한) 두꺼운 숲에서 해고 될 수 없다는 것입니다. 흥미롭게도, 슬링은 활에 필적하는 범위를 가지고있다. 저의 연구에서 가장 긴 슬링 샷 기록은 505m 였고, 활의 기록은 500m 이하였습니다. slingsing과 slinging에 대한 훌륭한 정보는 다음을 참고하십시오.


동영상이 도움이 되셨다면 유튜브 동영상 좋아요 및 구독 부탁드려요
.
.
.
.
.


보너스 영상 .


Primitive Technology: Chimney and pots 원시 기술 : 굴뚝과 화분

Primitive Technology: Chimney and pots 원시 기술 : 굴뚝과 화분


I installed a fireplace and chimney in the tiled roof hut. This is for for lighting and cooking. Heating is already taken care of by the underfloor heating system. I knocked a hole in the back wall and made it from the same mud used to build the hut. Some left over roof tiles were used as a chimney cap.

I made same pottery too. Clay was dug from the creek bank, mixed with broken crushed tiles as grog and formed into a cooking pot and 4 large water pots. I burnished them (rubbed till smooth) with a snail shell and a seed pod making them stronger and more water proof. Then I fired them in the tile kiln. The kiln fired pottery was larger and stronger than my previous pit fired pots and also had a lower breakage rate with only one of the five pots breaking.

I used the water pots to carry water from the creek to irrigate a sweet potato patch behind the wattle and daub hut (over the creek from the tile hut). The cooking pot was used to boil creek water. I used two different methods to show how to boil water: 1) in the kiln using it like a stove and 2) using pot boiling stones from the fire place. Boiling the water with rocks was faster than boiling a pot over a fire. Wooden tongs were made and rocks were put in the fireplace till they glowed red hot. The rocks were then put in the cold water in the pot. It only took 4 rocks to boil the water violently. This is probably the best method for sterilizing suspect water for drinking and could be done even without a pot (even a puddle next to a creek could be boiled this way).


나는 벽난로와 굴뚝을 기와 지붕 오두막집에 설치했다. 이것은 조명과 요리를위한 것입니다. 난방은 바닥 난방 시스템에 의해 이미 처리됩니다. 나는 뒷 벽에 구멍을 내고 그 오두막을 짓는 데 쓰인 진흙으로 만들었다. 지붕 타일 중 일부는 굴뚝 뚜껑으로 사용되었습니다.

나는 같은 도자기를 만들었다. 클레이는 크릭 (creek) 은행에서 파고 파손 된 깨진 타일을 grog로 섞어 요리 냄비와 4 개의 대형 화분으로 만들었습니다. 나는 달팽이 껍질과 씨앗 포드를 사용하여 더 강하고 더 많은 물 증거를 만드는 그들을 연마했다. 그런 다음 나는 타일 가마에서 그들을 해고했다. 킬른이 도자기를 발사 한 것은 이전의 구덩이를 내던 구덩이보다 크고 강했으며 5 개의 화분 중 하나만 파손하여 파손 율이 더 낮았습니다.

나는 개울에서 물을 나르기 위해 물 주전자를 사용하여 wattle과 daub 오두막집 (타일 오두막집의 크릭 위) 뒤에 고구마 패치를 관개했습니다. 요리 냄비는 작은 물을 끓일 때 사용되었습니다. 나는 물을 끓이는 방법을 보여주기 위해 두 가지 방법을 사용했다. 1) 스토브처럼 그것을 사용하는 가마에서. 2) 화재 장소에서 냄비 끓는 돌을 사용했다. 바위로 물을 끓는 것은 불 위에 냄비를 끓는 것보다 빠릅니다. 나무 집게가 만들어졌고 바위가 붉은 색으로 빛날 때까지 벽난로에 꽂혔다. 바위는 그 다음 남비의 찬물에 넣어졌다. 격렬하게 물을 끓일 때만 4 개의 암석이 필요했습니다. 이것은 아마도 음용수를 멸균하는 가장 좋은 방법 일 것이고, 냄비가 없어도 조심스럽게 먹을 수 있습니다 (크릭 옆의 웅덩이조차도 이런 식으로 끓일 수 있습니다).

동영상이 도움이 되셨다면 유튜브 동영상 좋아요 및 구독 부탁드려요
.
.
.
.
.

보너스 영상 .

Primitive Technology: Tiled Roof Hut 원시 기술 : 기와 지붕 오두막

Primitive Technology: Tiled Roof Hut  원시 기술 : 기와 지붕 오두막

I built this tiled roof hut in the bush using only primitive tools and materials. The tools I used have been made in my previous videos. It should be pointed out that I do not live in the wild and that this is just a hobby. It should be obvious to most that this is not a survival shelter but an experiment in primitive building technology.
To cut and carve wood I used the celt stone axe and stone chisel made in this video. To carry water and make fire I used pots and fire sticks made in this video. Finally, to store fire wood and dry, unfired tiles, I used the wood shed built in this video. 
The wooden frame was built with a 2X2m floor plan and a 2m tall ridge line with 1m tall side walls. 6 posts were put into the ground 0.25 m deep. The 3 horizontal roof beams were attached to these using mortise and tenon joints carved with a stone chisel. The rest of the frame was lashed together with lawyer cane strips. The frame swayed a little when pushed so later triangular bracing was added to stop this. Also when the mud wall was built, it enveloped the posts and stopped them moving altogether.
A small kiln was built of mud from the ground and a perforated floor of clay from the creek bank. It was only 25 cm internal diameter and 50 cm tall. Clay was dug, broken tiles (from previous batches) were crushed and added to it as grog and it was mixed thoroughly.This clay was pressed into rectangular moulds made from strips of lawyer cane to form tiles. Wood ash prevented the clay sticking to the stone. 20 tiles were fired at a time. 450 flat tiles and 15 curved ridge tiles were made with only a few breakages. 26 firings were done in all and the average firing took about 4 hours. The fired tiles were then hooked over the horizontal roof battens.
An underfloor heating system was built into one side of the hut to act as a sitting/sleeping platform in cold weather. This was inspired by the Korean Ondol or “hot stone”. A trench was dug and covered with flat stones with a firebox at one end and a chimney at the other for draft. The flames travelled beneath the floor heating it. After firing it for a while the stones stay warm all night with heat conducted directly to the sleeping occupant and radiating into the room.
The wall was made of clayey mud and stone. A stone footing was laid down and over this a wall of mud was built. To save on mud, stones were included into later wall courses. The mud was dug from a pit in front of the hut and left a large hole with a volume of about 2.5 cubic metres. 
The finished hut has a swinging door made of sticks. The inside is dark so I made a torch from tree resin. A broken tile with resin on it acts as a small lamp producing a lot of light and little smoke. The end product was a solid little hut, that should be fire and rot resistant. The whole project took 102 days but would have taken 66 days were it not for unseasonal rain. For a more in depth description see my blog 


나는 원시 도구와 재료만을 사용하여 수풀에서이 기와 지붕 오두막을 만들었습니다. 내가 사용한 도구는 이전 비디오에서 만들어졌습니다. 나는 야생에서 살지 않으며 단지 취미 일 뿐이라는 것을 지적해야한다. 이것이 생존 쉼터가 아니라 원시 건축 기술의 실험이라는 것이 대부분의 사람들에게 분명해야합니다.
나무를 자르고 조각하기 위해 나는이 비디오에서 만든 celt stone axe와 stone chisel을 사용했다. 물을 운반하고 불을 피우려면이 비디오에서 만든 화분과 불을 사용했습니다. 마지막으로 불 목재와 건조하지 않은 타일을 저장하려면이 비디오에 제작 된 나무 헛간을 ​​사용했습니다.
나무 프레임은 2x2m 평면과 높이가 1m 인 2m 높이의 융기 선으로 구성되었습니다. 6 개의 기둥을 0.25 m 깊이의 땅에 넣었다. 3 개의 수평 지붕 받침대는 돌 끌로 조각 된 장붓 구멍과 장부 조인트를 사용하여 이것들에 부착되었습니다. 프레임의 나머지 부분은 변호사 지팡이 조각과 함께 채찍질을했습니다. 밀었을 때 프레임이 약간 흔들리고 이후 삼각형의 브레이 싱이 추가되어이 현상이 멈추게됩니다. 또한 진흙 벽이 지어 졌을 때, 그것은 게시물을 감싸고 그것들을 완전히 멈추게했습니다.
작은 가마는 땅에서 진흙으로 만들어졌으며 크릭 ​​은행에서 찰흙으로 된 구멍이 뚫려있었습니다. 직경 25cm, 높이 50cm. 찰흙은 파헤 치고, 부서지는 도와 (이전 배치에서)는 분쇄되고 grog로 그것에 추가되고 철저하게 섞었다.이 점토는 변호사 지팡이의 지구에서 도와를 형성하기 위하여 직사각형 주형으로 눌러졌다. 우드 애쉬는 진흙이 돌에 달라 붙는 것을 방지했습니다. 20 개의 타일이 한 번에 해고되었습니다. 450 개의 평평한 타일과 15 개의 곡선 된 융기 타일이 단 몇 번의 파손으로 만들어졌습니다. 총 26 건의 발사가 모두 이루어졌으며 평균 발사에는 약 4 시간이 걸렸습니다. 해고되었던 타일은 그 다음 수평의 지붕 battens 위에 구부렸다.
추운 날씨에 앉아 있거나 잠자는 플랫폼 역할을하는 오두막의 한쪽면에 언더 플로어 (underfloor) 난방 시스템이 설치되었습니다. 이것은 한국의 온돌 또는 "핫 스톤 (hot stone)"에서 영감을 얻은 것입니다. 트렌치가 파헤 치고 한쪽 끝에는 화실, 다른쪽에는 굴뚝이있는 평평한 돌로 덮여있었습니다. 화염은 그것을 가열하는 바닥 아래로 이동했습니다. 그것을 잠시 동안 해고 한 후 돌은 밤새 잠자는 승무원에게 직접 전달되는 열로 밤새 따뜻하게 방안으로 들어옵니다.
벽은 점토 진흙과 돌로 만들어졌다. 돌 발 밑을 세우고이 위에 진흙 벽이 세워졌습니다. 진흙에 저장하기 위해 돌은 이후 벽 코스에 포함되었습니다. 진흙은 오두막 앞의 구덩이에서 파 내졌으며 약 2.5 입방 미터의 큰 구멍을 남겼습니다.

완성 된 오두막에는 막대기로 만든 흔들리는 문이 있습니다. 안쪽이 어두워서 나무 수 지로 토치를 만들었습니다. 수지가있는 깨진 타일은 많은 빛과 적은 연기를 생성하는 작은 램프 역할을합니다. 최종 제품은 단단한 작은 오두막집이었습니다. 그것은 화재와 썩음에 강해야합니다. 전체 프로젝트는 102 일이 걸렸지 만 비 계절적 비가 아니라면 66 일이 걸렸을 것입니다. 좀 더 깊이있는 설명은 내 블로그를 참조하십시오.

동영상이 도움이 되셨다면 유튜브 동영상 좋아요 및 구독 부탁드려요
.
.
.
.
.


보너스 영상 .


Primitive Technology: Palm Thatched Mud Hut 원시 기술 : 팜 초가 진흙 오두막집

Primitive Technology: Palm Thatched Mud Hut  원시 기술 : 팜 초가 진흙 오두막집
.

This is an old hut I built 2 years ago and have since demolished. It was a 2 m square floor with wattle and daub walls 1.5 m high topped with a pyramidal roof thatched with Alexander palm fronds. The building method is my usual plan- get a roof up first then build the walls. From start to finish it took 27 days (it could have been faster though- this was at a casual speed). This was the first wattle and daub hut I built and is larger than the other one I built later (my idea for now is to build small but well although I'll try larger huts again in future). 

The roof lasted for a few months before becoming rotten and bug eaten. As an important note the species of palm used in thatching makes all the difference. Had this hut been built in the mountain with wait-a-while palm fronds it would have lasted 2 years at least. 
Instead it was thatched with alexander palm fronds that deteriorated quickly.

I wasn't to know this and was trying to adapt hut building practice I learned in the mountain to low land conditions (I've built similar huts up the mountain with the same roof shape that have lasted a long time). I hope in future videos to explore better roofing options to use in areas like this.

Also of interest in the video is another pot I make showing more detail than previous videos. The fire place for the hut is a simple pit in the center of the floor. It is a good hut design though it requires a simple ladder to construct.
Primitive Technology Blog: https://primitivetechnology.wordpress...


이것은 내가 2 년 전에 지었고, 그 후 파괴되었다. 그것은 알렉산더 야자 잎과 함께 초가 지붕으로 덮인 높이 1.5m의 물 웅덩이와 두꺼운 벽이있는 2m짜리 사각형 바닥이었다. 건물 방법은 평소 계획입니다. 먼저 지붕을 들어 벽을 만듭니다. 처음부터 끝까지 27 일이 걸렸습니다 (빠른 속도 였지만 더 빠를 수있었습니다). 이것은 내가 만들었고, 나중에 만들었던 다른 하나보다 큰 나의 첫번째 wattle와 daub 오두막집이었다 (내가 더 큰 오두막집을 나중에 다시 시험해 볼 것이다.

지붕은 몇 달 동안 지속되어 썩어서 먹은 버그가되었습니다. 중요한 사실은 가려움증에 사용되는 종려 나무가 모든 차이를 만든다는 것입니다. 이 오두막집이 야자 나무 잎이있는 동안에는 적어도 2 년은 지속되는 동안 기다란 산으로 지어졌습니다.
대신 그것은 빨리 악화 된 알렉산더 종려 나무 잎으로 초가공되었습니다.

나는 이것을 알지 않고 산에서 배웠던 오두막집 건물을 낮은 토지 조건 (나는 오랫동안 지속 되어온 같은 지붕 모양의 산을 따라 비슷한 오두막을 만들었다)에 적응 시키려고했다. 미래의 비디오에서 이와 같은 분야에서 사용할 더 나은 루핑 옵션을 찾아보기를 바랍니다.

또한 비디오에 대한 관심은 제가 이전 비디오보다 더 자세하게 보여주는 또 다른 냄비입니다. 오두막의 화재 장소는 바닥 중앙에있는 단순한 구덩이입니다. 그것은 단순한 사다리가 필요하지만 좋은 오두막 디자인입니다.

원시 기술 블로그 : https : //primitivetechnology.wordpress ...


동영상이 도움이 되셨다면 유튜브 동영상 좋아요 및 구독 부탁드려요
.
.
.
.
.

보너스 영상 .


Primitive Technology: Wood shed and Native bee honey 원시 기술 : 나무 헛간과 네이티브 벌꿀

Primitive Technology: Wood shed and Native bee honey  원시 기술 : 나무 헛간과 네이티브 벌꿀


It has been raining here quite a bit in what should normally be the dry season. The wattle and daub hut is standing up well despite this (see video). However this has held back some other projects I had planned. So I decided to build a wood shed across the creek in Eucalypt woodland (where the best firewood is). Keeping firewood dry cuts down the amount of firewood needed and decreases the amount of smoke produced. Also keeping the firewood in an external structure saves room in the hut and leaves no place for snakes and rodents to hide. The shed is simply a 1 x 1 m thatched hut with a lower area used to store fire wood (1 cubic meter) and an upper level for storing fire starting equipment (fire sticks, tinder, stone blades for carving new holes in the sticks). I built it using wood from a previous hut to save effort and trees. It is tied together with lawyer cane and thatched with large palm leaves- These are a poorer quality than those in the mountain and will probably need replacement in a few months. I keep a large stone in front of the shed to break firewood over to save effort. Also while looking for fire wood I came across a fallen native sting-less bee hive. I ate some honey from it and stored it on the fireplace out side the hut. This keeps it sheltered from the rain, exposes it to morning sun to keep it warm and keeps it away from ants. In return perhaps the bees will produce honey (1 kg/year) and wax that I may use.


평소에 건기가되어야 할 곳에서 꽤 비가 내리고 있습니다. wattle과 daub 오두막집은 이것에도 불구하고 잘 서있다 (비디오를 본단다). 그러나 이것은 내가 계획했던 다른 프로젝트를 보류했다. 그래서 나는 Eucalypt 삼림 지대 (최고의 장작이있는 곳)의 개울 건너편에 나무 헛간을 ​​짓기로 결정했습니다. 장작을 마를 때 마른 장작은 필요한 장작을 줄이고 생산되는 연기의 양은 줄입니다. 또한 장작을 외부 구조에 보관하면 오두막에 방이 저장되고 뱀과 설치류가 숨길 곳이 없습니다. 창고는 화재 나무 (1 입방 미터)를 저장하는 데 사용되는 낮은 지역과 화재 시작 장비 (화약에 스틱에 새 구멍을 뚫기위한 화염 스틱, 틴더, 석재 블레이드)를 보관하는 데 사용되는 상부 레벨의 1x1m 초가 오두막입니다. . 나는 노력과 나무를 저장하기 위해 이전 오두막에서 나무를 사용하여 그것을지었습니다. 변호사 지팡이와 함께 묶여 큰 야자 나무 잎으로 가렵습니다. 이들은 산에있는 사람들보다 품질이 좋지 않으므로 아마도 몇 달 안에 교체가 필요할 것입니다. 나는 창고 앞에 커다란 돌을 놓아 장작을 저장하고 장작을 끊었다. 또한 불 나무를 찾는 동안 나는 타락한 네이티브 덤불이없는 벌집을 발견했습니다. 나는 그것으로부터의 약간의 꿀을 먹었고, 오두막집의 오두막집 밖의 벽난로에 그것을 저장했다. 이것은 빗속으로부터 보호되어 아침 햇살에 노출되어 따뜻하게 유지하고 개미로부터 멀리 떨어지게합니다. 대가로 꿀벌은 벌꿀 (1kg / 년)과 왁스를 생산할 것입니다.


동영상이 도움이 되셨다면 유튜브 동영상 좋아요 및 구독 부탁드려요
.
.
.
.
.

보너스 영상 .